Hayabusa-tråden

Myke

Busa Myke
Gick med
3 Feb 2007
Ort
Lidköping
Hoj
Hayabusa-00, CB750-71
16 bits ECU 99-00,24 bits ECU 01 och framåt
Bromsat hos McX.press 175.28hp på slangen, 153.76 nm
HMF helsystem 2 burkar
Moddad luftburk
Moddad insprutsystem
3-mod
Kn-filter
bort pairvalve

Grymt bra resultat, RESPECT!:yoparty

Har labbat lite i excel med att jämföra och beräkna diff (genom att kopiera in mapparna från PCIII) i tabellform, varvtal mot trottelläge. Om man utgår från den optimerade mappen för originalsystem vilka är olika för olika modeller -00/-01 och sedan räknar fram diff mellan optimerat program med effektsystem -01 och original -01 som sedan adderas på original -00 så borde man komma rätt nära vad samma system skulle ge för program på en -00, eller???:va
Jag gissar att tabellerna för % förändring av bränslemängd per 250 varvtal och trottelläge är lika även om original ecu:n är 16 eller 24 bitars???:va
Är det nån som vågar rekomendera mej att prova ovanstående teori?:)
Det är väldigt lätt att sedan jämföra det framräknade förslaget mot existerande mappar så det inte blir heltokigt!:tummenupp ??
Om någon av er är villig att skicka sin dyrt förvärvade mapp så jag kan prova ovanstående?!:) :)
Skall precis bygga upp ett nytt system baserat på originalkrökarna men med X-flow förgrening istället för den flödeshämmande originlasplittern samt dubbla ovala IXIL kolfiber slipon som highpipes liknande HMF-systemet!:yoparty
 

f.lofgren

medlem
Gick med
21 Apr 2004
Ort
Ljusdal
Hoj
Hayabusa -01
Skall se om jag hinner ladda ner den från power commandern imorgon,i så fall så kan du gott få min så du har något att jämföra med:tummenupp
Dessa värden fick jag på "slangen"
164,46 hp
138,88 Nm
Och detta är gjort åt hojen
DNA filter
Viper slipon
 

f.lofgren

medlem
Gick med
21 Apr 2004
Ort
Ljusdal
Hoj
Hayabusa -01
MYKE!
Nu har jag laddat ner mappen i från pcn.
PMa mig vart du vill ha mappen(Via mail,eller pm,eller?)
 

TurboBuser

NR Racing
Gick med
11 Jun 2006
Ort
Med GixxerLady
Hoj
Buse-07 Fullvuxen med 313 rwhp!
Vad kör ni med för inställningar på dämparna?

Kör själv med denna:

Fram
Preload 2.5 lines showing
Compression Out 2 clicks
Rebound Out 2 clicks

Bak
Compression Out 5 clicks
Rebound Out 7 clicks


Några andra som är värda att prova?
 

c0ngo

Sist i ledet
Gick med
8 Apr 2007
Ort
Ockelbo
Hoj
Kawa ZX10 -06
Skall se om jag hinner ladda ner den från power commandern imorgon,i så fall så kan du gott få min så du har något att jämföra med:tummenupp
Dessa värden fick jag på "slangen"
164,46 hp
138,88 Nm
Och detta är gjort åt hojen
DNA filter
Viper slipon

Bänkade på Bike i Trollhättan 24/5.
Acrapovic evolusion, kn filter, Pc lll.
171,38 hp, 139,71 nm.
 

f.lofgren

medlem
Gick med
21 Apr 2004
Ort
Ljusdal
Hoj
Hayabusa -01
Ja det ger lite mer med helsystem ser jag :tummenupp
Sedan kanske det påverkar lite att du har en -07 också,den kan ju inte ha gått så långt än.
Vad fick du böta för akra systemet om man får fråga?

MYKE har du fått till någon fungerande mapp eller håller du på och labbar än?
 

Myke

Busa Myke
Gick med
3 Feb 2007
Ort
Lidköping
Hoj
Hayabusa-00, CB750-71
Ja det ger lite mer med helsystem ser jag :tummenupp
Sedan kanske det påverkar lite att du har en -07 också,den kan ju inte ha gått så långt än.
Vad fick du böta för akra systemet om man får fråga?

MYKE har du fått till någon fungerande mapp eller håller du på och labbar än?

Jorråsåattee!!!
Jag tog de slipon-mappar som fanns till min -00 och kopierade över allihop till excel, tog meddeltal från alla usa-mappar, adderade diffen mellan dessa och USA std till europa std, lade till den enda europa slipon som fanns, skapade ett nytt medel och som grädden på moset tog jag lågvarvs responsen och liten trottel från din mapp. Tyvärr så diffade din mapp lite för mycket på övriga punkter för att jag skulle våga lägga till den också, det kan ju vara större avvikelser mellan våra årsmodeller så att de har olika optimum!?:va
Monterade samtidigt på IXIL sliponen och KN-filtret så nu går den betydligt bättre över hela registret och all gastvekan är borta, dessutom blev den rappare på gasen från tomgång, det låter ju iallafall fräckt!:yoparty
Nästa steg blir att bygga om det extra std systemet jag just inhandlat för att kapa bort kattarna, räta ut 2-1-2 förgreningen och plugga purge/egr ventilerna. Sen blir det nog lilla luftburks moden innan riktig bänkkörning på Bike:yoparty
 

Ebbek

Ny medlem
Gick med
10 Jun 2004
Ort
Timrå
Hoj
BUSE 1300 - 99
lightvave

Moddad insprutsystem
hur har dom gjort då ??
 
Last edited:

lightvave

Ny medlem
Gick med
11 May 2006
Ort
Kalix
Hoj
Hayabusa -99
Det undrar jag också :confused: ://R
http://www.fastsjonny.tk/

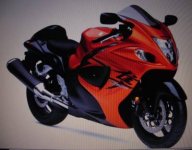
The fuelsystem of the Hayabusa is full with fuelfilters. One in the tank, two filters in the fuelpump, one in the fuelpressure-regulator and one in every injector. The 1999 models can get fuelproblems because of a clogged regulator and fuelpumpfilter. The newer models do not have these problems but a lot of Hayabusa-owners removed most of the filters to get a better throttle-response.

For this modification you will need some towels or something like that because of some fuelleaking. I also bought a new 30cm piece of 8mm steal breaded hose and two clamps to replace the returnline. Be sure you have some oil for the O-rings. Put a little oil on the O-rings when taken out (injectors, fuelpump, regulator). When the come in contact with air they will dry out, get oversized and do not fit anymore.

I removed the regulatorfilter, one of the fuelfilters in the pump and the four injectorfilters.
Ok, let us start with the job.

Draining the tank:
The easiest way is to drain the tank. On the tank there are two fuellines, one from the petcock and the returnline. I took the first one from the fuelpump put the end in a clean bucket and drained the tank. After the removals are done you can put the fuel back. Here I used the towel because otherwise some fuel would find his own way all over the engine. After the tank is completely drained I plugged the returnline with a screw and turned off the petcock by turning the middle-part 90 degrees anti-clockwise to be sure no fuelrests were coming out.
I did not clean or remove the tankfilter because it is a big one (about 4"), but when you want to be sure you can take it out and clean it. Therefor you have to remove the petcock and take the complete part out.

Disassembly of fuelpump, regulator and injectorrail:
To remove the injectorrail you have remove the airbox, so we start with that.

You will find the airbox under the tank, but there are a few hoses and connectors on it that you will have to disconnect before removing the airbox. Also don't forget the screwes at the left and right sight to loosen the connection between airbox and engine.

To remove the filters of the fuelpump and the injectors the easiest way is to take the fuelpump out complete with all the injectorrail and the injectors. You have to be careful because the injectors are very sensitive and you can damage them very easy.
The fuelpump is covered with isolation because of the heat coming from the engine. It is located on the right side, just behind the throttles under the tank. You have to remove the fuelpump before you can remove the isolation. You will find the five bolts which screwhead which hold the pump on the throttleside of the pump. You need a good fitting screwdriver, not the one from the hayabusa maintenancekit because then you will damage the screwheads.
For the injectorrail you have to remove the four mountingscrews on the top of the rail (cuppercolored, one on each injectorblock).

Before you remove the complete assembly be sure that:
- fuellines from tank to pump are removed
- electricalconnector of fuelpump is disconnected
- electricalconnectors of the four injectors are disconnected
- the tirewrap what is holding the wires to the electricalconnectors to the injectors and pump is removed.
- vacumehose is removed from pumpregulator on top of pump

When I took the pump and injectorrail of, the injectors came out very easy. When one of the injectors is not coming out, leave it in till you have taken of the fuelpump and injectorrail and take it out afterwards. Take care you do not damage the tip of the injector by hitting the throttles. Use the towel as underground. Use some oil on the O-rings of the injectors to prevent them to dry out.


Removal of fuelpumpfilter:
We start with the pumpfilters. Slip off the heat-isolation of the pump and remove the bolts holding the bracket. Once the bracket is removed take the four screws out holding the pumphousing together. Split the pumphousing.
Disconnect the wires, look very good how the pumppart is fitted and take it out. Now the difficult part of the job. You have to remove the plastic carrier. I used a pair of tongs but be carefull you do not damage it. Put some oil on the O-ring, otherwise you have to replace it.
On the backside of the carrier there is a small round filterscreen. I removed it totally by popping it out.


Once removed, put the carrier back in the pumphousing. Use a little oil to let it go a little smoother. Then put the pump back in and connect the wires. Use a little oil on the O-ring of the housingparts and then put it back together. Screws back and the pumpfilterpart is done.
Some people do also remove the paperfilter in the other part of the pumphousing, I didn't. It is a large paperfilter and I left it in because I do not expect it to be clogged very fast.

Removal of regulatorfilter:
Okay, now the regulator. The regulator is located on the top of the pump and had a vacumehose connected to it. Loosen the two screws and remove the regulator. You will find a little filter underneath. This is the filter what is clogged on almost every 99 model hayabusa. You can do two things; when you have a 99 model and the filter is all clogged with cupperparts (see photo) then clean it and leave it in, when you have a 2000+ model and it is not clogged with cupperparts then leave it out. It is difficult to get it out, so when you want to use it again take care you do not damage it.


Screw the regulator back on, screw the bracket back on the filterhousing. Be sure all screws and bolts are tightened and slip on the heatisolation.

Removal of injectorfilters:
That was the pumppart, now we start with the injectors.
Some people only blast them out, others remove the filters because you will notice a better throttle-response one you removed them.
Separate the injectors from the injectorrail by plugging them out. They come out very easy.
The filters are on the top of the injectors (the backside) and you can not put them back once you removed them. I took a little screwdriver, a metalwire and a pair of tweezers to get the filters out. The first three of them came out very easy, the last one took about half an hour.


Reinstall:
Now the job is done we have to reinstall the complete assembly; injectors, injectorrail and fuelpump. Put the injectors back on the injectorrail and be sure you oiled the O-rings on the injectors. Take the complete assembly, put it in the right position carefully (keep looking to the tips of the injectors!!), be sure all the injectors are positioned right and put them in their holes of the throttlebodies. When you did that part of the job, put the screws on the top of the injectorrail back in and tighten them. Then put the fuelpump on his place, screw the bracket back on, then we start with the connectors and hoses.

When the fuelpump is back on put the vacumehose on the regulator and connect the electrical connector to pump. After that put the four electrical connectors back on the injectors and use a tirewrap to keep the wires on their place.

Now I installed the new hose from tank to fuelpump. The stockhoses are very flexible and when they are getting hot it is very easy to crack them, what will block the airflow. Therefor my advise is to replace the stockhoses with metal breaded 8mm hoses.
Do not forget to open the petcock by turning it 90 degrees clockwise!

The fuelfilterpart is done. Now you have to put the airbox back on and put the fuel in the tank.

When everything is back on his place turn the ignition on, only to let the fuelpump do his work. Do this about five times before you start the engine, just to be sure that there is fresh fuel in the fuellines, fuelpump and injectors. Check for leakages and make a testdrive. I'm sure you will notice some difference!
 
Last edited:

i8lusaka

Ny medlem
Gick med
11 Apr 2005
Ort
johannesburg
Hoj
ZX10R 2009
Bakdel

Jag funderar pa att skaffa en busa som andrahoj for lite langre resor an det jag gor mer min KTM 950 SMR.
Jag tycker att hojen e grymm men jag ar inte fortjust i bakdelen sa om nagon har tipps pa snygg bakdel , bilder etc typ gsxr 1000 bak eller liknade sa far ni garna lagga upp det.
:tummenupp
 

Hulkomania

Ny medlem
Gick med
24 Jan 2005
Ort
Island of Kings
Hoj
ZX-10R
Däck

Skrev tidigare i tråden ang. däck...
Har nu satt på en uppsättning pilot sport HPX och kört ca 150mil.
Grymt bra bett, man kan defenitivt stå på hårdare ut ur kurvorna:tummenupp
Nackdelen är att det ser ut som de rullat de tre dubbla... glad om jag får ut 400 mil!
Körde tidigare på pilot road som varade i ca 600mil men kunde gått minst 50 till.

Nästa uppsättning blir evt. nya pilot road 2ct som fått bra kritik för sitt fäste på sidorna samt lång livslängd.

Nån här som provat nya road 2ct?
 

rocketer

Medlem
Gick med
30 Oct 2005
Ort
Centralt
Hoj
Hayabusa 2008
Skrev tidigare i tråden ang. däck...
Har nu satt på en uppsättning pilot sport HPX och kört ca 150mil.
Grymt bra bett, man kan defenitivt stå på hårdare ut ur kurvorna:tummenupp
Nackdelen är att det ser ut som de rullat de tre dubbla... glad om jag får ut 400 mil!
Körde tidigare på pilot road som varade i ca 600mil men kunde gått minst 50 till.

Nästa uppsättning blir evt. nya pilot road 2ct som fått bra kritik för sitt fäste på sidorna samt lång livslängd.

Nån här som provat nya road 2ct?

Jag körde med HPX däcken både fram och bak - funkade hyffsat. Tyckte att dom var klart hårdare än Pirellina jag hade innan men de var racedäck så jämförelsen är inte riktigt ok :rolleyes: . Ny hoj och däcken slut så nu blir det just de du nämner ..... 2ct. Få se hur de känns oc upplevs?//R
 

c0ngo

Sist i ledet
Gick med
8 Apr 2007
Ort
Ockelbo
Hoj
Kawa ZX10 -06
Jag körde med HPX däcken både fram och bak - funkade hyffsat. Tyckte att dom var klart hårdare än Pirellina jag hade innan men de var racedäck så jämförelsen är inte riktigt ok :rolleyes: . Ny hoj och däcken slut så nu blir det just de du nämner ..... 2ct. Få se hur de känns oc upplevs?//R

Har 2 ct på hojen.
Mycket nöjd med dessa.
Känns som man kan lita på greppet till 100%.
:tummenupp
 

Wiseguy

Medlem nr.8 sen starten
Gick med
6 Mar 2003
Ort
+46 Rover, wanderer, Nomad, vagabond
Hoj
Honda CBR900RR Fireblade, CBR1100XX Blackbird
Slänger upp en liten bild vad som eventuellt komma skall....
Börjar ju vara dags att byta ut den gamla designen.
 

Bifogat

  • ym0708hyoshi.jpg
    ym0708hyoshi.jpg
    93.6 KB · Visningar: 128

Wiseguy

Medlem nr.8 sen starten
Gick med
6 Mar 2003
Ort
+46 Rover, wanderer, Nomad, vagabond
Hoj
Honda CBR900RR Fireblade, CBR1100XX Blackbird
Tycker designen var ganska lika på båda bilderna.
Raptor hävdar ju att deras bild är tagen från nästa års broshyr. Skall bli intressant att sei vilket fall som helst...
 
Nyheter
Bike kör Stark Varg på GGN 2.0!

I veckan blev det klart att...

Transportstyrelsen siktar på höjda avgifter

Transportstyrelsen har medd...

Insektsfaunan hårt drabbad efter nedläggningen av Järva MK:s motorbana

Efter nedläggningen av Järv...

Ny R1 Race och R1 GYTR

Pressrelease från Yamaha ...

Paul Edmondson ny chef för Triumph Racing Enduro Team

Motorsportlegenden och fler...

Miguel Oliveira klar för Yamaha

Miguel Oliveira och Lin Jar...

Suzuki utvecklar döda-vinkeln-kamerasystem

En ny patentansökan har avs...

BMW köper Suzuki-data – nästa steg MotoGP?

Sedan en tid har olika rykt...

HRC och Repsol avslutar samarbete

Efter 30 års samarbete på d...

MV Agusta utvecklar ny trecylindrig motor

MV Agusta har officiellt be...

Top